If you’ve got a shingle roof that needs removing or replacing, you might think that you’ve got to hire an experience roofing contractor to help you. While this is the easiest way to get the job done – it isn’t the cheapest.
In this article, we’re going to look at how to tear off shingles yourself, so you can get it done at a fraction of the cost.
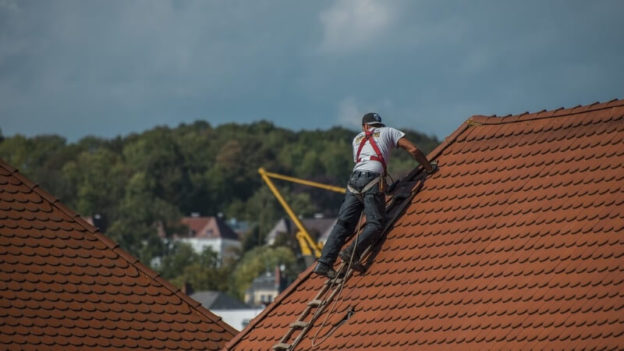
Remember, safety is always your main priority when tearing off. If you haven’t got the right equipment or aren’t sure you can do a safe job – then don’t. Get someone in. However, if you’re careful, you can save on this part of a re-roofing job. You might still need to hire an expert contractor to apply your new roof, but that should cost less as you’ve removed the old one yourself.
Benefits of tearing off shingles
If you tear off your old shingle roof, that normally means you’re about to get a completely new roof. This is normally the best option for older roofs with a lot of damage, and especially ones that have already been overlaid.
You see, a slightly damaged shingle roof can be temporarily fixed by overlaying a new layer of shingle. This can often be a cheaper option and could give your roof another decade or two of good use. You can also spot fix certain areas with re-laying if your whole roof doesn’t have issues.
However, you can only overlay a roof once. This means that for many of you – tearing off and applying a completely new roof. Either a new shingle roof, or you could decide to go with a different finish.
The good news is that although a new roof might be more expensive, it’s the most sustainable and durable option and should give your home protection for decades. One way to save on the costs of a completely new shingle (or other) roof, is to remove the old layer yourself and then hire an expert to apply the new one, rather than hiring them to do the whole job themselves.
If you want to know how to tear off your old shingle roof, then you’re in the right place. Let’s have a look:
How to tear off shingles – First steps
This needs repeating just to emphasize how important it is, remember: safety first. You need to make sure you’ve got the right equipment and gear to do the job safely. If you’re unsure, don’t do it.
Expert roofers have years of experience performing this sort of work in a safe way. Don’t work alone and make sure you’ve got the right harnesses and other safety equipment. Work slowly and methodically and don’t rush anything. Don’t work in adverse weather conditions or poor light.
If you’ve got your safety sorted, we can start looking at how to do the tearing off process yourself:
Make sure you’ve got all the right tools for the job. These include:
- roof jacks
- chalk line
- broom magnet
- ladders
- roofing shovel
- hammer and tacker
- gloves
- broom
- pry bar
- safety harness
- goggles.
Your first step is to start planning. You might want to start by getting a few bids from roofing contractors to see how much they quote for the price. You’ll want to know if the savings are really worth making compared to the time and effort it might take you to do the job.
You might also want to check local building regulations for advice and to see exactly what roof finishes are allowed in your area – or if there are any specific rules in your location.
Your preparation work should involve protecting windows and air-con units with secured plywood (using a hammer and nails). You should also cover up plants in the garden and other things that need protecting new your house with tarps.
Nail the roof jacks below the area you intend to tear off and secure wooden boards as protection. Rent a container or skip and place it near your roof so that you can easily throw old shingles into it.
Make sure you wear your safety harness at all times and keep secured to the roof in a safe manner.
You can now start stripping the roof with your tear off tools. Remember to start at the peak and work downwards. Work from the area furthest from your trash skip first. Use a garden fork or a roofing shovel to tear away ridge caps first and then the rest of the shingles. Works downwards towards the pre-installed safety board you put in place earlier.
Ignore when some nails come up with shingles and others don’t. Work downwards and then start at the top again to work in rows. Throw all the shingles and roof pieces, along with any other debris, off the roof into your trash container. Dispose of multiple smaller pieces rather than removing big heavy pieces all at once.
Take care around chimneys, roof windows and other areas with flashing. Some of these might need replacing if they are rusty or cracked, but you can preserve ones that are in good shape if you’re careful.
You can carefully bend flashing and pull shingles from underneath if you’re trying to save it. When you’ve completed everything above the roof jacks, you can remove them and start working the lower part of your roof and down to the edges. Be careful at the eaves and remove shingles with your hands.
After you’ve removed all the shingles and any old flashing, give the roof a good clean. Apply protective ice and water barriers to keep the roof secure against rain and other weather until a new roof has been installed.
How to remove shingles – When to hire an expert
If you don’t understand any of these steps, or think it feels complicated, you might want to hire an expert to do the job for you. While you might save some money on tearing off your own roof, your safety is more important. If you haven’t got the time or inclination to fix your roof yourself, then find an expert contractor who can do a great job for you so you don’t have to.